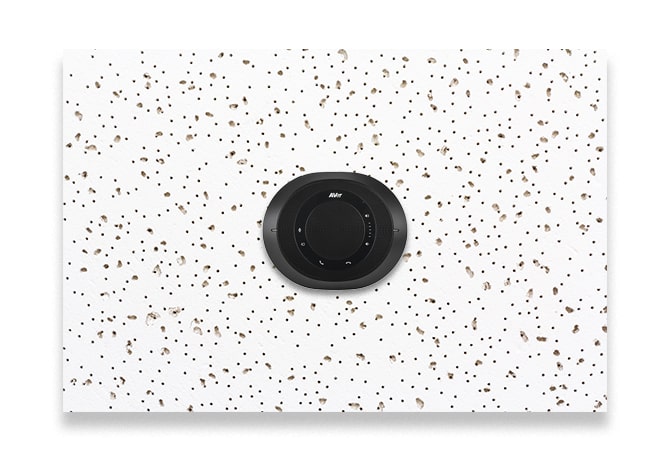
Ceiling Mounting Installation Guide for AVer VC520 Speakerphones
AVer VC520 Pro Installation Guide
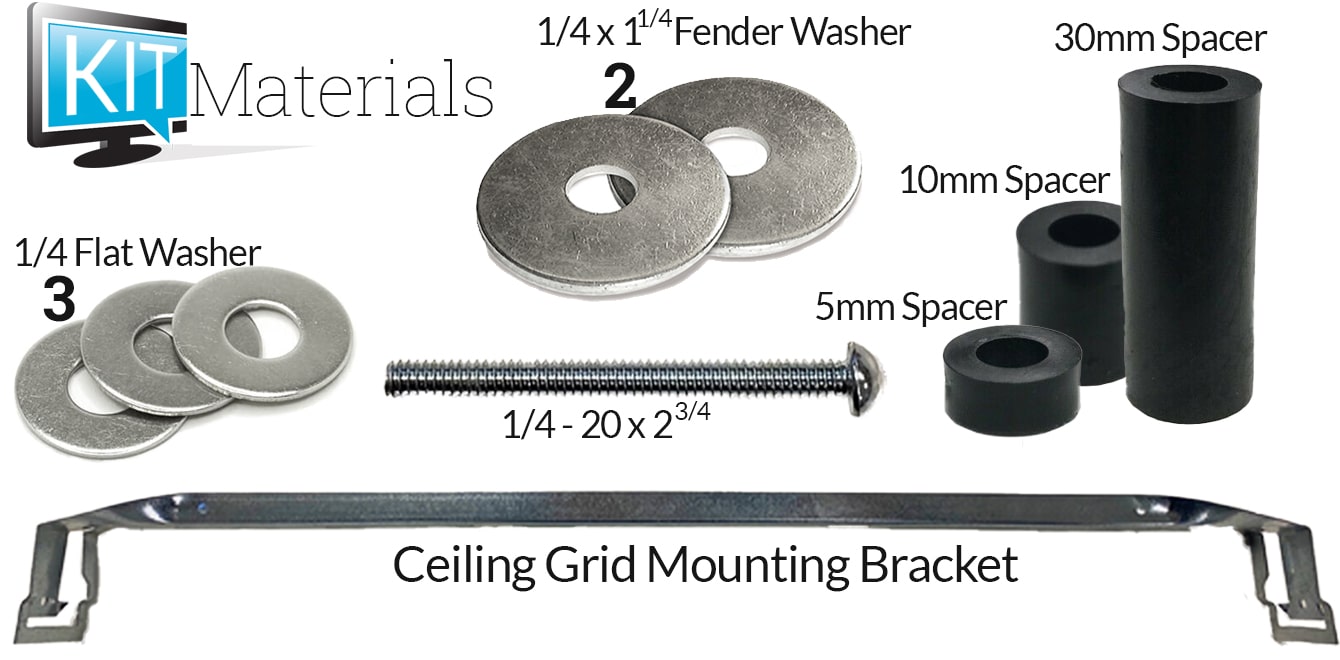
Kit Materials
The following materials are included in the installation kit:
- (1) Ceiling Grid Mounting Bracket
- (1) 30mm Spacer
- (1) 10mm Spacer
- (1) 5mm Spacer
- (2) 1/4" x 1 1/4" Fender Washer
- (3) 1/4" Flat Washer
- (1) 1/4" x 2 3/4" Screw
Installation
Installation Planning:
- Each V520 Pro and Pro 2 speakerphone has a maximum voice pickup range of 15 feet
- If installing a single speakerphone, select a location approximately within the center of room participants/room seating (this may or may not be the center of the room).
- If installing two or more speakerphones, select locations allowing for an overlap of coverage, no less than 25 feet and no more than 30 feet between speakerphones.
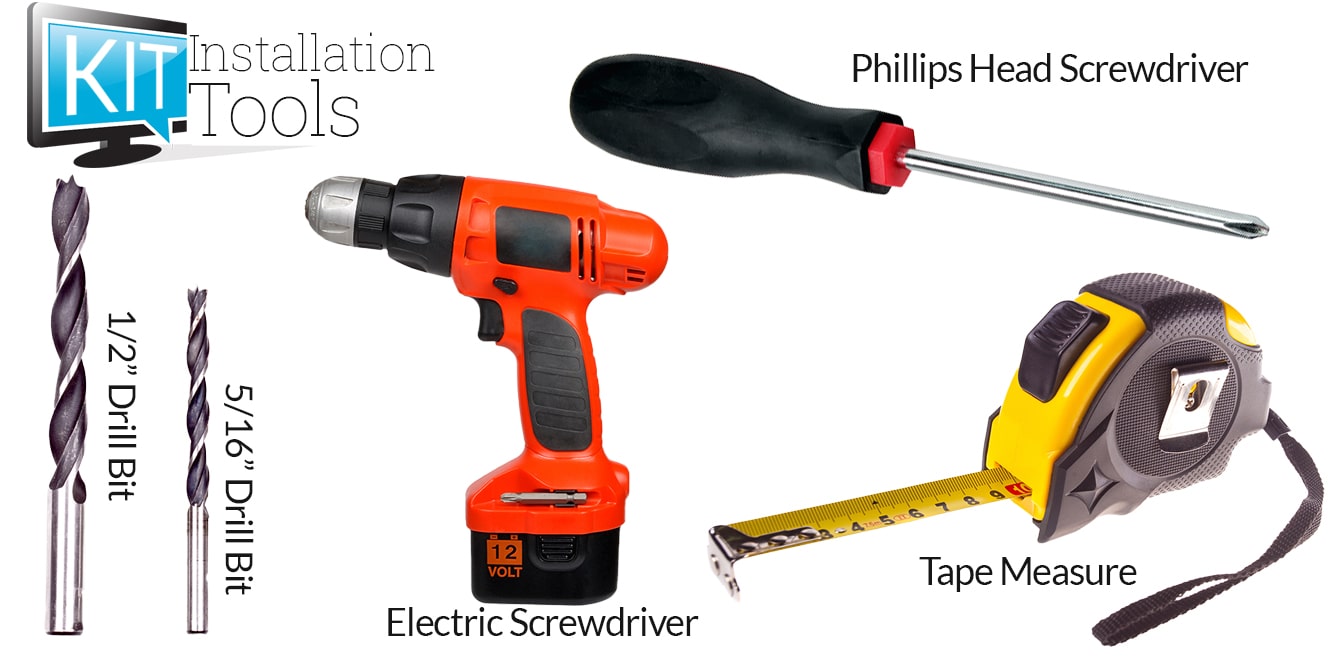
The following tools are required or suggested:
- Electric/Battery Powered Drill
- Drill Bits: (1) 3/4" and (1) 5/16"
- Phillips Head Screw Driver
- Ladder or Step-stool (tall enough to safely work above ceiling height)
- It is suggested to have someone assist when removing or replacing ceiling tiles
Assembly Instructions
Step 1. Remove ceiling tile from the ceiling.
a) Position the ladder directly below the ceiling tile
b) For a standard acoustic drop ceiling tile, push up and tilt to remove tile
NOTE: Care should be taken when working from a ladder, it's suggested to have someone assist in removing and replacing ceiling tiles. Never reach or lean beyond the balancing point of the ladder.

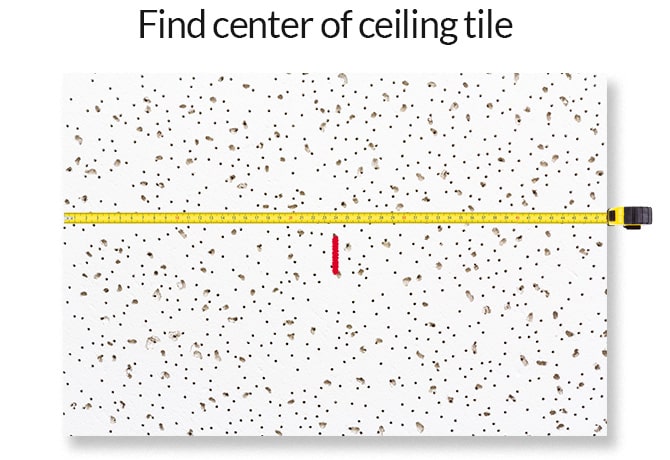
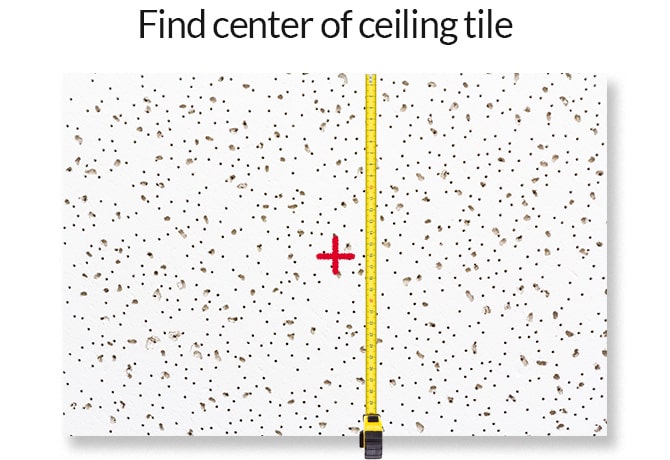
Step 2. Find center of your ceiling tile.
a) Measure and mark the center/half of your ceiling tile’s width.
b) Measure from your width’s center mark to half of your tile’s total length and this will be your center of your entire ceiling tile. See illustration below:
Step 3. Drill Center Hole
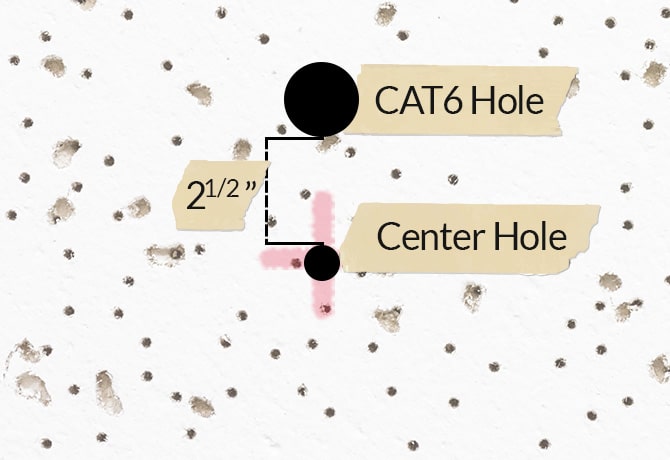
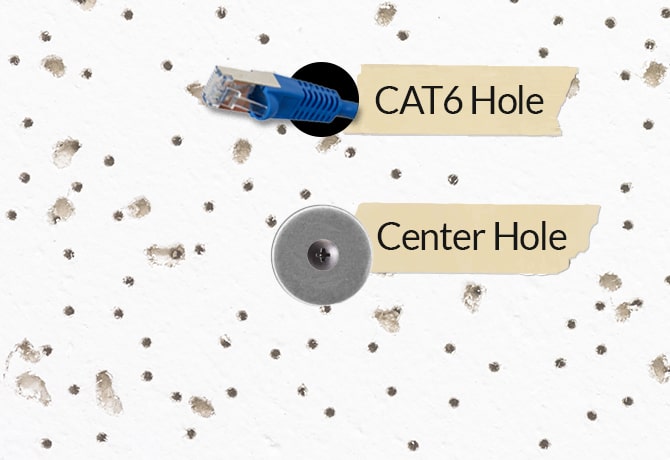
a) Use a 5/16-inch drill bit to drill a hole through the center mark of the ceiling tile (Drill from finished side of the tile to avoid possible damages to the surface).
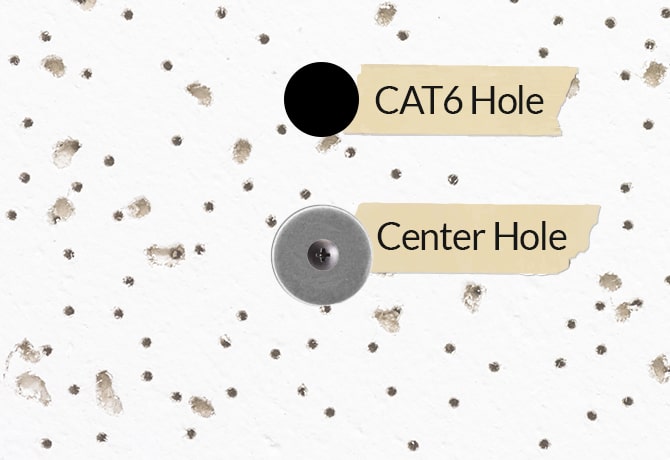
b) Also, you will need a 1/2- inch drill bit to drill a hole to fit the CAT6 through ceiling tile. Measure 2-1/2 inches from the center hole to where the back of the speaker will sit for the CAT6 to be plugged in.
Step 4. Bracket Support
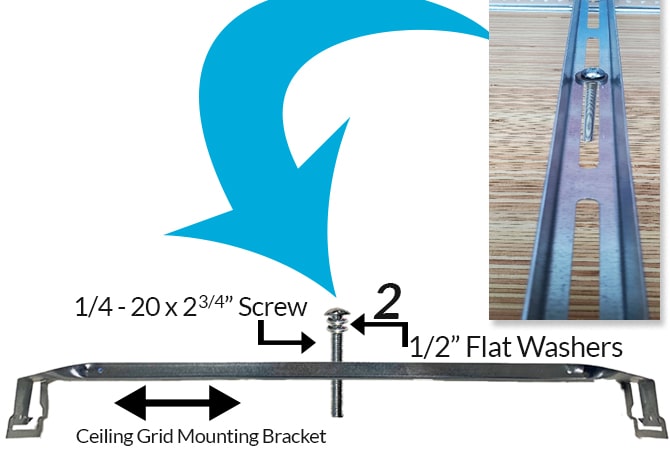
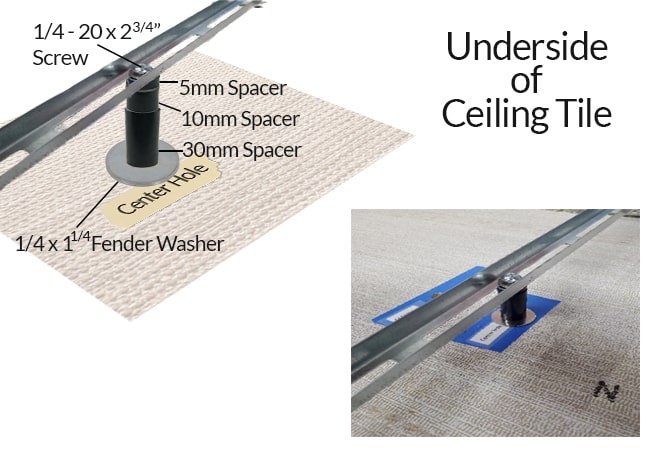
Take 1/4-20x2-3/4 screw along with two 1/4inch flat washers and put them through the center hole of the ceiling grid mounting bracket.
Step 5. Spacer Assembly
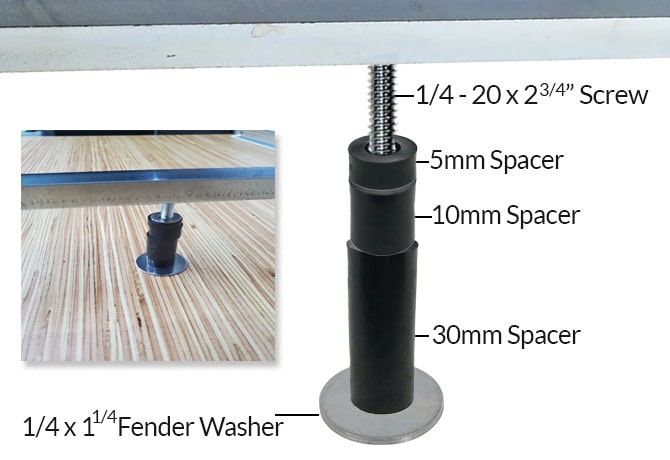
Spacer Assembly Add 30mm spacer, 10mm spacer, 5mm spacer and one 1/4 flat washer.
Step 6. Add Washer
Add 1/4x1-1/4 fender washer to the underside of the tile.
Step 7. Secure Bracket to Tile
To secure bracket to tile, place the screw through the ceiling grid mounting bracket along with the washers and spacers into the center hole of the tile. Make sure that you are on the back side of the ceiling tile.
Step 8. Secure Before Replacing Tile
Use another 1/4x1-1/4 fender washer and 1/4-20 nut (or anything you have that will hold the washer in place) on the finished side of the ceiling tile to hold it in place while you position the ceiling tile back in the ceiling grid.
Step 9. Secure Tile in Grid
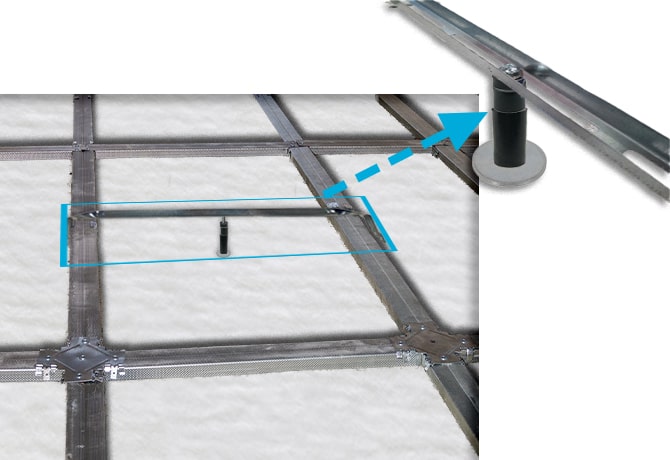
Ensure the ceiling grid mounting bracket is secured onto the ceiling grid.
Step 10. Cat6 Cable
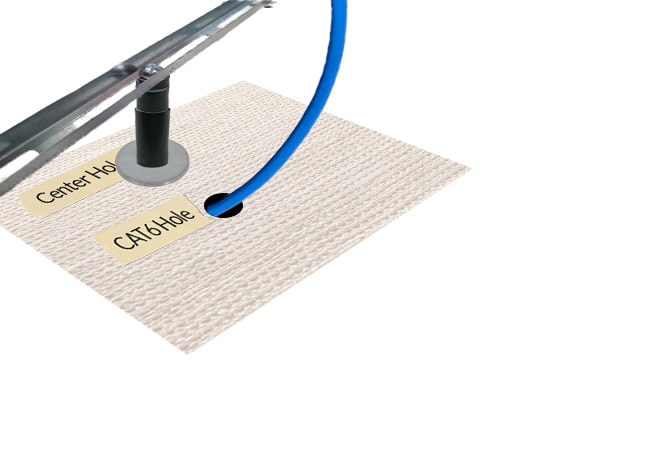
Once the ceiling tile is securely in place, feed the connection end of the CAT6 through the 1/2-inch hole in ceiling tile leaving the ferrite core in the ceiling.
Step 11. Connect CAT6 to the Speakerphone.
Once the Cat6 cable is through the tile, extend it enough to connect allow connection to the speakerphone
Step 12. Secure the Speakerphone
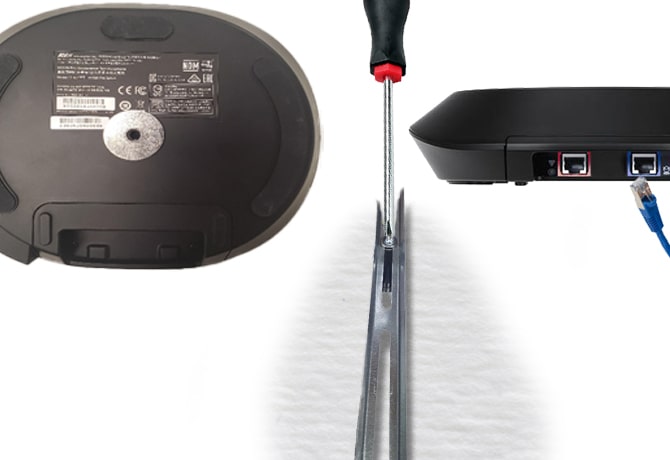
Place the other 1/4x1-1/4 fender washer on center hole of speakerphone, line it up with the center hole and push screw down with a ‘Philips’ screwdriver and secure speakerphone. It is a possibility that you will not need all washers in some circumstances. Therefore, you will need to remove the small washers accordingly.
Step 13. Installation complete.

