The Secret to Zoom Rooms Success is Planning
Posted by Ryan Pinke on 9/11/2018

We spend a lot of time with clients during their planning process and most of that time is spent in talking through Zoom Rooms installation and design. The end goal is always having a great looking room and have one of their employees walk into and start working. That kind of "ease of use" doesn't just happen, it's planned. We like to tell them, "easy is hard work".
Where we start depends upon the size of the company and their past experience with video conferencing. If we are working with a large company looking to transition to Zoom from a legacy platform requires a different approach than a smaller company starting from scratch and want to have a their meeting rooms video conferencing enabled.
Regardless of the situation, there are a few steps within the planning process that will help, all are easy to do.
Step One: Architectural Review
Now many people know what's behind the wall? Or how much power is required for different types of equipment? When planning any meeting room, you need to know both the layout and the structure of the room. We dive into different aspects of power and power outlets, network connectivity, light sources, wall construction, type of ceiling, and potential noise. Remember you are creating a new environment for your meeting rooms, one that needs to work when it's only one person or the room is at capacity. We also have to take into consideration the products being used - there is a significant difference between mounting a standard HD display and a fully interactive whiteboard, along with camera placement and optimizing audio. Working from blueprints helps to keep everyone on the same page and alleviate problems during installation.
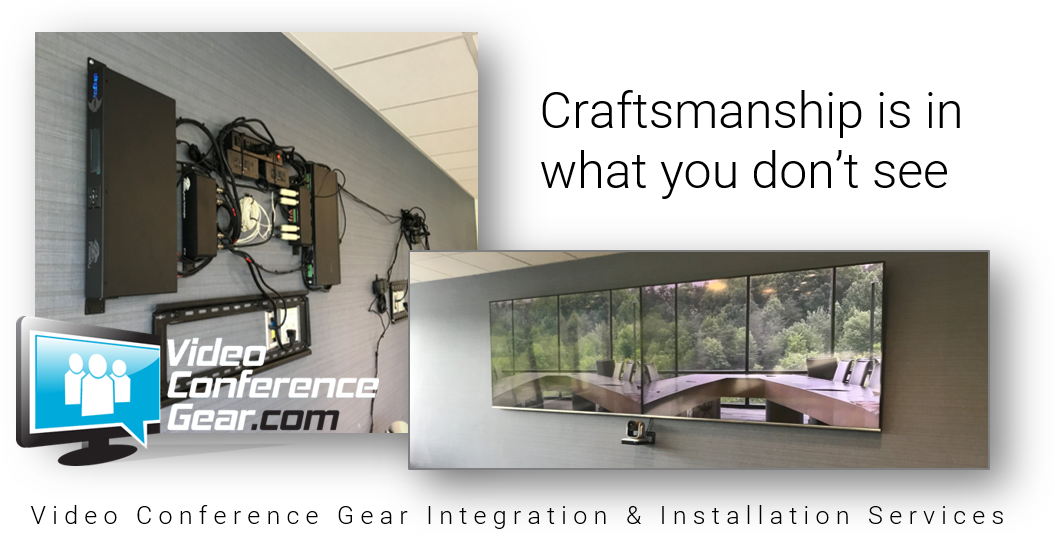
Step Two: Take Pictures (and lots of them)
Reviewing blueprints and architectural design is a great place to start, adding pictures takes it to the next level. First, we've seen enough rooms to realize that what was on the original blueprints, may not have actually made it the finished room. Even if everything is where it should be, modifications could have been made, or a power outlet may be a foot further over than expected. When we have pictures, we can confirm everything, and be prepared if there are differences. In larger projects, the planners may not have seen the room themselves and it's always dangerous to take someone else's description as fact. We know some of the little things that can cause big installation delays - because we have had to deal with them in the past. We can look at a picture and quickly get a feeling for how hard, or easy, a particular room will be. Taking pictures, from lots of different angles, helps the planning and actual installation.
Step Three: Matching Products to Room
One of the reasons we have so many variations of Zoom Room kits online is that every room is slightly different. All modern conferencing cameras are great at handling variations in lighting conditions, but there are some which do a much better job for extreme conditions. Room audio can be affected differently by background noise. And if you plan to do lots of instructor lead training, that requires a different set of products and features than a huddle room, where anyone could talk. Each room is different - from how you plan to use, to lighting, to noise - each of these factors need to be taken into consideration so you have the best products for each.
Bonus Step: Room Mockup
There is nothing worse than finishing a room installation and then figuring out it just doesn't work. It might be how people within room need to sit to see the displays, or it could be participants not being able to see a whiteboard. There are dozens of small things that could get in the way of having a great room experience. So why not "mockup" the room prior to installation. It could be as simple as taping a piece of paper on the wall to determine if the displays are in the right place. Or you could take a video with your phone to see how the video would look to a participant. Thinking through those small things will either confirm your decisions, or make you reconsider something - either way, you will keep you from making a potentially expensive mistake.
Those three steps, if added to your Zoom Rooms project (regardless of size or scope) will reduce both time and stress when it comes to the actual installation and setup of the rooms. These simple steps are often overlooked, even by experienced professionals.
At Video Conference Gear, we have helped hundreds of companies with their Zoom Rooms planning and project preparation. It's one of the core services we offer. Check out all our services and contact us if you have any questions.